Python 17 - FastAPI (post, forward방식, Jinja2)
POST 로 받기
from fastapi import FastAPI
import uvicorn

app = FastAPI()

@app.get("/")
async def root():
    return {"message": "Hello World"}

@app.get("/param")
async def param(a:int=7):
    return {"param": a}

@app.post("/post")
async def post():
    return {"post": "post"}


if __name__ == '__main__':
    uvicorn.run(app, host="localhost", port=8000)
위에 로직에서
@app.get("/param")
async def param(a:int=7):
    return {"param": a}
Python에서는 param() : 파라미터에 들어가는 반환값을 (문자열,숫자) 자유롭게 형변환 할 수 있다.
- param(a) : 문자
- param(a:int) :문자에서 숫자로 형변환
- param(a:int=7) : 값을 지정할 수 있음

@app.post("/post")
async def post():
    return {"post": "post"}
@app.post : post 방식으로 데이터를 보낸다.
1. POST로 보내기 연습
from fastapi import FastAPI,Form
import uvicorn

app = FastAPI()

@app.get("/")
async def root():
    return {"message": "Hello World"}

@app.post("/post")
async def post(b: str = Form()):
    return {"post": b}

if __name__ == '__main__':
    uvicorn.run(app, host="localhost", port=8000)
post의 파라미터에 form() 메서드를 선언하고 import 해준다.
@app.post("/post")
async def post(b: str = Form()):
    return {"post": b}
<post.html>
<!DOCTYPE html>
<html>
<head>
<meta charset="UTF-8">
<title>Insert title here</title>
</head>
<body>
	<form action="http://localhost:8000/post" method="post">
		<input type="text" name="b" value="888"/>
		<input type="submit" value="포스트로 보내기"/>
	</form>
</body>
</html>
post를 넘길 때 중요한 점을 변수명과 name의 이름이 같아야 한다
작성하고 실행시키면 python-multipart가 install 되지 않아 오류가 난다.
Anaconda Prompt에서 install 해준다.
- 명령어 입력
pip install python-multipart
이후 실행시켜보면 제대로 출력이 된다.
2. FORWARD 방식으로 보내기 (Jinja2Templates)
[jinja2를 이용하면 템플릿 엔진을 사용해서 애플리케이션 내 변수와 반복문, 조건문 등을 포함하는
HTML 파일을 렌더링할 수 있다.]
<myfast01.py>
from fastapi import FastAPI,Form,Request
import uvicorn
from starlette.templating import Jinja2Templates
from starlette.staticfiles import StaticFiles
from scrapy.http.response.html import HtmlResponse

app = FastAPI()
app.mount("/static", StaticFiles(directory="static"), name="static")
templates = Jinja2Templates(directory="templates")


@app.get("/forw",response_class=HtmlResponse)
async def forw(request:Request):
    return templates.TemplateResponse("forw.html", {"request":request,"id": "1"})

if __name__ == '__main__':
    uvicorn.run(app, host="localhost", port=8000)
Jinja2 배열 꺼내기
1)배열을 선언하고 request 보낸다.
@app.get("/forw",response_class=HtmlResponse)
async def forw(request:Request):
    a = "홍길동"
    b = ["이명박","김경수","김기춘"]
    #JSON방식으로 요청한다.
    return templates.TemplateResponse("forw.html", {"request":request,"id": "1","a":a,"b":b})
2) 데이터 출력
<!DOCTYPE html>
<html>
<head>
<meta charset="UTF-8">
<title>Insert title here</title>
</head>
<body>
	FORWARD{{id}}<br/>
	{{a}}<br/>
	{{b}}<br/>
</body>
</html>
출력할 때도 JSON방식으로 작성한다.
JSON과 같은 형태를 파이썬에선 DICTIONARY라고 한다.(사전배열)

여기서서 배열을 제대로 꺼내주려면 반복문을 사용해야한다
for문 돌리기
	{% for i in b %}
	{{i}}
	{%endfor%}
- {% %} : 자바의 스크립틀릿과 같은 파이썬의 영역이다.

문자열로 잘 출력된다.
Dictionaty loop (사전배열) 꺼내기
변수 c 를 꺼내보자!
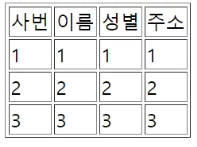
@app.get("/forw",response_class=HtmlResponse)
async def forw(request:Request):
    c = [
            {"e_id":"1","e_name" : "1", "sex":"1","addr" :"1"},
            {"e_id":"2","e_name" : "2", "sex":"2","addr" :"2"},
            {"e_id":"3","e_name" : "3", "sex":"3","addr" :"3"}
        ]
    return templates.TemplateResponse("forw.html", {"request":request,"c":c})
json방식으로 넣어주고
<table border="1px">
	<tr>
		<td>사번</td>
		<td>이름</td>
		<td>성별</td>
		<td>주소</td>
	</tr>
{% for i in c %}
	<tr>
		<td>{{i.e_id}}</td>
		<td>{{i.e_name}}</td>
		<td>{{i.sex}}</td>
		<td>{{i.addr}}</td>
	</tr>
{%endfor%}
</table>
꺼낼 때 name과 value (키 값) 으로 데이터를 가져올 수도 있지만
이 방식으로 가져올 수도 있다.